Securing SSH and commits with a FIDO2 key
If you are curious or interested in FIDO2 security keys and how to use them as SSH keys or to sign your Git commits, this is the blog for you. If you are using Token2 FIDO2 keys and macOS, even more so.
Why a FIDO2 security key?
I wanted to explore and level up my security posture.
FIDO2 security key have a few advantages, you can use them as passkeys on websites that support them.
Passkeys are a passwordless solution that is seeing uptake even though things are still young.
FIDO2 security keys are also a stronger form of OTP because the key is bound to a specific web domain.
This eliminates a class of phishing where an attacker presents you with https://fakebank.com and proxy to your real bank site to get your credentials and empty your bank account.
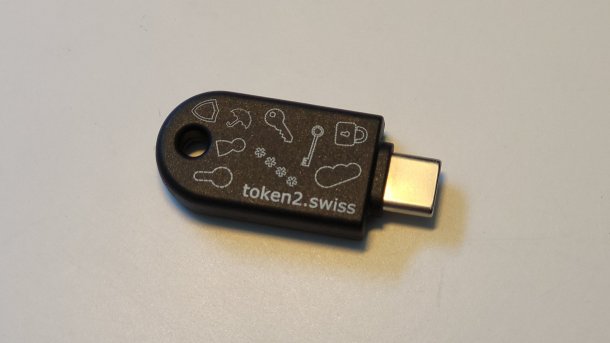
The big security key vendor is Yubico but there are alternatives like the Swiss vendor Token2.
Set up SSH so it works
Skip this section if you are not on macOS.
Apple disabled the security key support from their system level OpenSSH at least up to and until Sonoma 14.5. Let’s use the one offered by Homebrew and disable the Apple one.
If you don’t use macOS, you can skip this section assuming OpenSSH is at version 8.2 or above.
# Install openssh
brew install openssh

# disable Apple's ssh-agent for the current user
launchctl disable user/$UID/com.openssh.ssh-agent
You can then install your own launchctl based daemon as explained
in this great article but I prefer to set it up when I start a terminal since I do no use ssh except in a terminal.
The idea is to start Homebrew’s ssh-agent version if not started already.
I use zsh as my shell and oh-my-zsh to pump it up.
oh-my-zsh has a plugin to set zsh but you can find examples on how to do it in plain .zshrc)
I will customize it a tiny bit through environment variables.
# Make sure to set Brew path ebfore oh-my-zsha nd ssh-agent
export BREW_PREFIX=$([[ "$(arch)" == "arm64" ]] && echo "/opt/homebrew" || echo "/usr/local")
[[ "$PATH" != "*$BREW_PREFIX/bin*" ]] && export PATH="$BREW_PREFIX/bin:$PATH"

#
# SSH AGENT
#
export SSH_AUTH_SOCK="~/.ssh/agent" # the socket ssh agent uses

...

# add identities to ssh via oh-my-zsh
zstyle :omz:plugins:ssh-agent identities id_ed25519_token2bio2 id_ecdsa_token2nfcslim id_rsa

# enable ssh0-agent with oh-my-zsh
plugins=(
  ssh-agent
  ...
)

[...]
A bug workaround with SSH_ASKPASS (a long parenthesis)
Skip this section initially and come back ot it if you need to.
This is a special case, only add
SSH_ASKPASSSSH_ASKPASS_REQUIREif you are encountering this bug and want a way out. Otherwise, move to the next section.
There seems to be a bug for FIDO2 keys with pins (e.g. no fingerprint) or at least for Token2 NFC Slim which does not let you type the pin upon ssh handshake.
I’ve seen this bug happening when using git accessing GitHub (via ssh) on macOS
and when my security key has been created with -O verify-required (see later).
The workaround is to install ssh-askpass which will start a GUI at the right time.
brew install theseal/ssh-askpass/ssh-askpass
Now this is a bit inconvenient to get that GUI pop up.
So only enable it for the security keys that need that aspect.
In my case, I have a classic ssh key (software), and two hardware keys (in case I lose or break one).
My second key has fingerprint in lieu of the pin call and the flow works without ssh-askpass 🤷.
Let’s improve .zshrc to use ssh askpass only when my key is plugged.
If the key is plugged, then enable askpass, otherwise disable it.
And allow to reset ssh-agent in case you plug the key after the terminal has stated.
First, find the serial number of the key creating the bug.
# list all USB devices
# we should see one called "FIDO2 Security Key" or soemthing approaching
$> ioreg -p IOUSB -b
+-o Root  <class IORegistryEntry, id 0x100000100, retain 31>
  +-o AppleT8122USBXHCI@00000000  <class AppleT8122USBXHCI, id 0x100000388, registered, matched, active, busy 0 (932 ms), retain 42>
    +-o AppleT8122USBXHCI@01000000  <class AppleT8122USBXHCI, id 0x100000390, registered, matched, active, busy 0 (1333 ms), retain 57>
        +-o FIDO2 Security Key@01100000  <class IOUSBHostDevice, id 0x10000ccf5, registered, matched, active, busy 0 (46 ms), retain 32>

# let's find the USB Device signature
$> ioreg -p IOUSB -b -n "FIDO2 Security Key" | grep "UsbDeviceSignature"
ioreg -p IOUSB -b -n "FIDO2 Security Key"
"UsbDeviceSignature" = <123456789>
You will get a unique and longer singature instead of 123456789.
Finally let’s tweak ssh askpass usage in our .zshrc.
#
# SSH AGENT
#
export SSH_AUTH_SOCK="~/.ssh/agent"
export SSH_ASKPASS="/opt/homebrew/bin/ssh-askpass"

# useful for Token2 NFC Slim
#replace 123456789 with your key
ioreg -p IOUSB -b -n "FIDO2 Security Key" | grep --quiet "1234567889"
# this is Token2 NFC Slim which need ssh-askpass
if [ $? != "0" ]; then
  #no bug so ignore the password GUI
  export SSH_ASKPASS_REQUIRE=never
else
  export SSH_ASKPASS_REQUIRE=force
fi

# A function you can call after you plug or unplug the key to reset ssh-agent
rebootSshAgent() {
  killall ssh-agent
  source ~/.zshrc
}
Now when you plug the key, you can call from your terminal rebootSshAgent to reset.
OK bug worked around, let’s generate and use our security key!
Generate the SSH key
You have 3 choices to make:
- the key algorithm
- whether the key is portable across devices from your security key
- whether you force to type a pin at usage or not
The key algorithm
There are two types of keys you can use: ecdsa-sk and ed25519-sk.
Some security researchers have doubts about ecdsa which came from NIST witout explanation on how the parameters were generated but it’s the standard and is always available.
ed25519 is not always supported by your FIDO2 key but is considered very solid and fully transparent.
I recommend you use ed25519-sk if it’s supported in your environment.
Portable key or no portable key
In “classic” ssh, keys have a private part and a public part (the .pub file).
The private part in case of a security key is a stub that references the security key, it is not the private key itself.
In security keys, portable keys also called resident keys. It means that you can use the ssh key on any device you can plug the security key in. You can regenerate the public and private stub on the device off the security key. This is very useful but a bit risky. Anyone with the security key (theft) can use your private key. The security key can (should!) be protected by a pin but that’s the only barrier.
Non resident keys can only be used on the device the specific private key stub is present. You can not re-generate this private stub out of the security key. This limits the risk surface but is a bit inconvenient as you need to copy the stub on each system you want to run ssh with the security key.
Keys are non resident by default but you can pass the following option at key creation time: -O resident.
Forcing pin
When creating a key, you can force some behavior like no need for pin nor touch, force just pin, force just touch or force both pin and touch.
I selected myself a PIN and a touch as required (most secure).
It’s the option -O verify-required.
Let’s generate the key
# use ed25519, use a resident key and force touch and pin
# -C is the comment for the key and a convinient way to differentiate a key from another
ssh-keygen -t ed25519-sk -O resident -O verify-required -C "Token2 NCF Slim"
Name your key, I personally use id_cryptoalgo_device (e.g. id_ed25519_yubikey).
From then, move the two files (private stub and public key files) under ~/.ssh and use your SSH key as usual.
For example, you can list your ssh key on GitHub as authentication and signing key. Here is a post with more details on how to sign your commits.
Hope it has been useful for you or for me in the future ;)


Comments